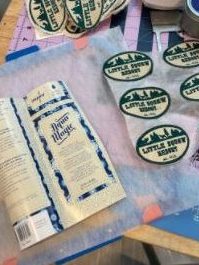
This is one of the easiest ways I’ve ever tried to create patches on my embroidery machine. I needed to make a small batch (to me that’s anything less than 100 and needed fairly quickly (within a week in this case). I only needed 18, but I do like to make just a few more in case of any “ incidents”. Keep in mind that this is only one of a hundred different ways to make a patch. Customize your own patch making by experimenting with lots of different options and materials until your patches come out just as you envision!
These patches are set up in my Stitch Artist Level Three software by Embrilliance. (affiliate link!) I use this as the primary digitizing software for my projects because I love the complete control I have over the stitches when I use the various modules together.
I started with digitizing the patch elements, then made sure that I had a light fill running the opposite direction as the elements. I placed this fill behind the elements, so that it would stitch first, then copied that shape and made a rope-like satin border for the raggy version and used the Merrowed Patch Border tool in Stitch Artist Level Three for a perfectly finished border for the smaller one! Follow along and I will explain exactly how I stitched up these Merrowed Edge Patches.
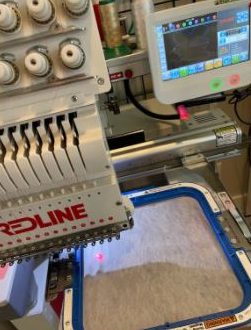
Hoop Washaway Mesh stabilizer (like Inspira’s Aqua Magic or Pellon Wash N Gone 541) tightly in your hoop. For my hoops, I like to be sure that it will be firmly stretched when I put the top of the hoop together, so I use a bit of painter’s tape to secure the edges before I snap on the top.

Float a piece of craft felt that is 3 mm thick to be the base for the patches. I prefer using polyester or acrylic felt, not wool, so that the patch will be a long lasting product that resists breaking down over time. Select a color that is close to the shade you want for the background since the fill stitch is not completely solid.
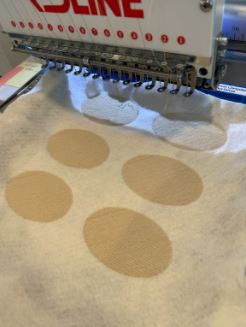
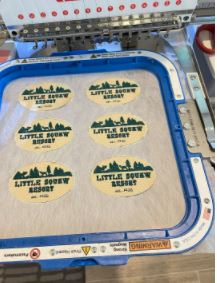
Run the fill stitching for the background. You can see that if you use different colors you could achieve really creative effects by using contrasting or gradient stitching for the fill.

Run the patch details in your chosen colors. Just a reminder, before you run a whole large frame full of multiples, run individual patches until you get all the details perfect. Don’t be discouraged if it takes more than a couple of stitchouts. Thread is fairly inexpensive, and there’s plenty more at your local quilt shop, so don’t be afraid to use the good stuff even when making samples.
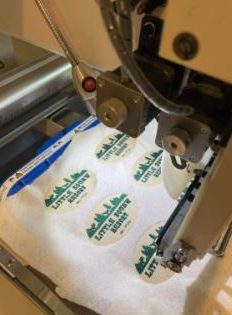
After your details are stitched out, the Merrowed Edge Patch Border will run a single line of stitching. You can run this line of stitching in the same color you will use for your Merrowed Edge. Be sure that you change your bobbin thread to match your top thread for the Merrowed Edge.
Trim around the felt very close to the stitching line.

Use very fine point scissors to get as close as possible to the stitching line. Take care that you only cut the felt, not the stabilizer. If you have to “frame out” your frame in order to get access to trim all the patches in your hoop, be sure to return the hoop to the stopped position.

Run the Merrowed Edge stitching for your patch and admire that beautiful edge!
Remove your project from the hoop and very carefully trim around the patch edge without cutting into the Merrowed Edge stitches. If you have excess stabilizer, you can run a damp sponge or washcloth around the edge to further clean up the edge.

After your patch is dry, your patch is ready to apply wherever you want it! You can use a thermal adhesive cut to fit your patch, or apply it with an adhesive like Beacon Fabri-Tac or Aleene’s Fabric Fusion.

Excellent post. Thanks so much for taking the time to write. My Navy deployed son has been asking for some custom patches and it’s on my list to try. How did you get your fonts so tiny? Did you create using points or was this a font?
LikeLike
I digitized it. The super tiny one was too tiny to be a satin stitch font, so I just drew it as a bean stitch.
LikeLike
You should do it! It’s not terribly hard – but I did digitize these myself. For small lettering I play with the underlay to get it just right (I like an edge run and only a loose zig zag for the underlay) AND I use 60 wt thread. That is good with this material (the twill) Of course, that is where the testing comes in – it’s not just the font to play with, but on what kind of material you would be using as well.
LikeLike
Nice work
LikeLike
Thank you! It’s fun when things work out!! I don’t tend to tell everyone about the big mess I made trying to get there! LOL!
LikeLike