
Here’s a fun way to get a really cool effect for In The Hoop Embroidery Patches

These patches are set up in my Stitch Artist Level Three software by Embrilliance. I use this as the primary digitizing software for all of my “in the hoop” and embroidery projects because I love the complete control I have over the stitches when I use the various modules together. In this post, I will explain exactly how I stitched and finished these Iridescent Merrowed Edge Patches.
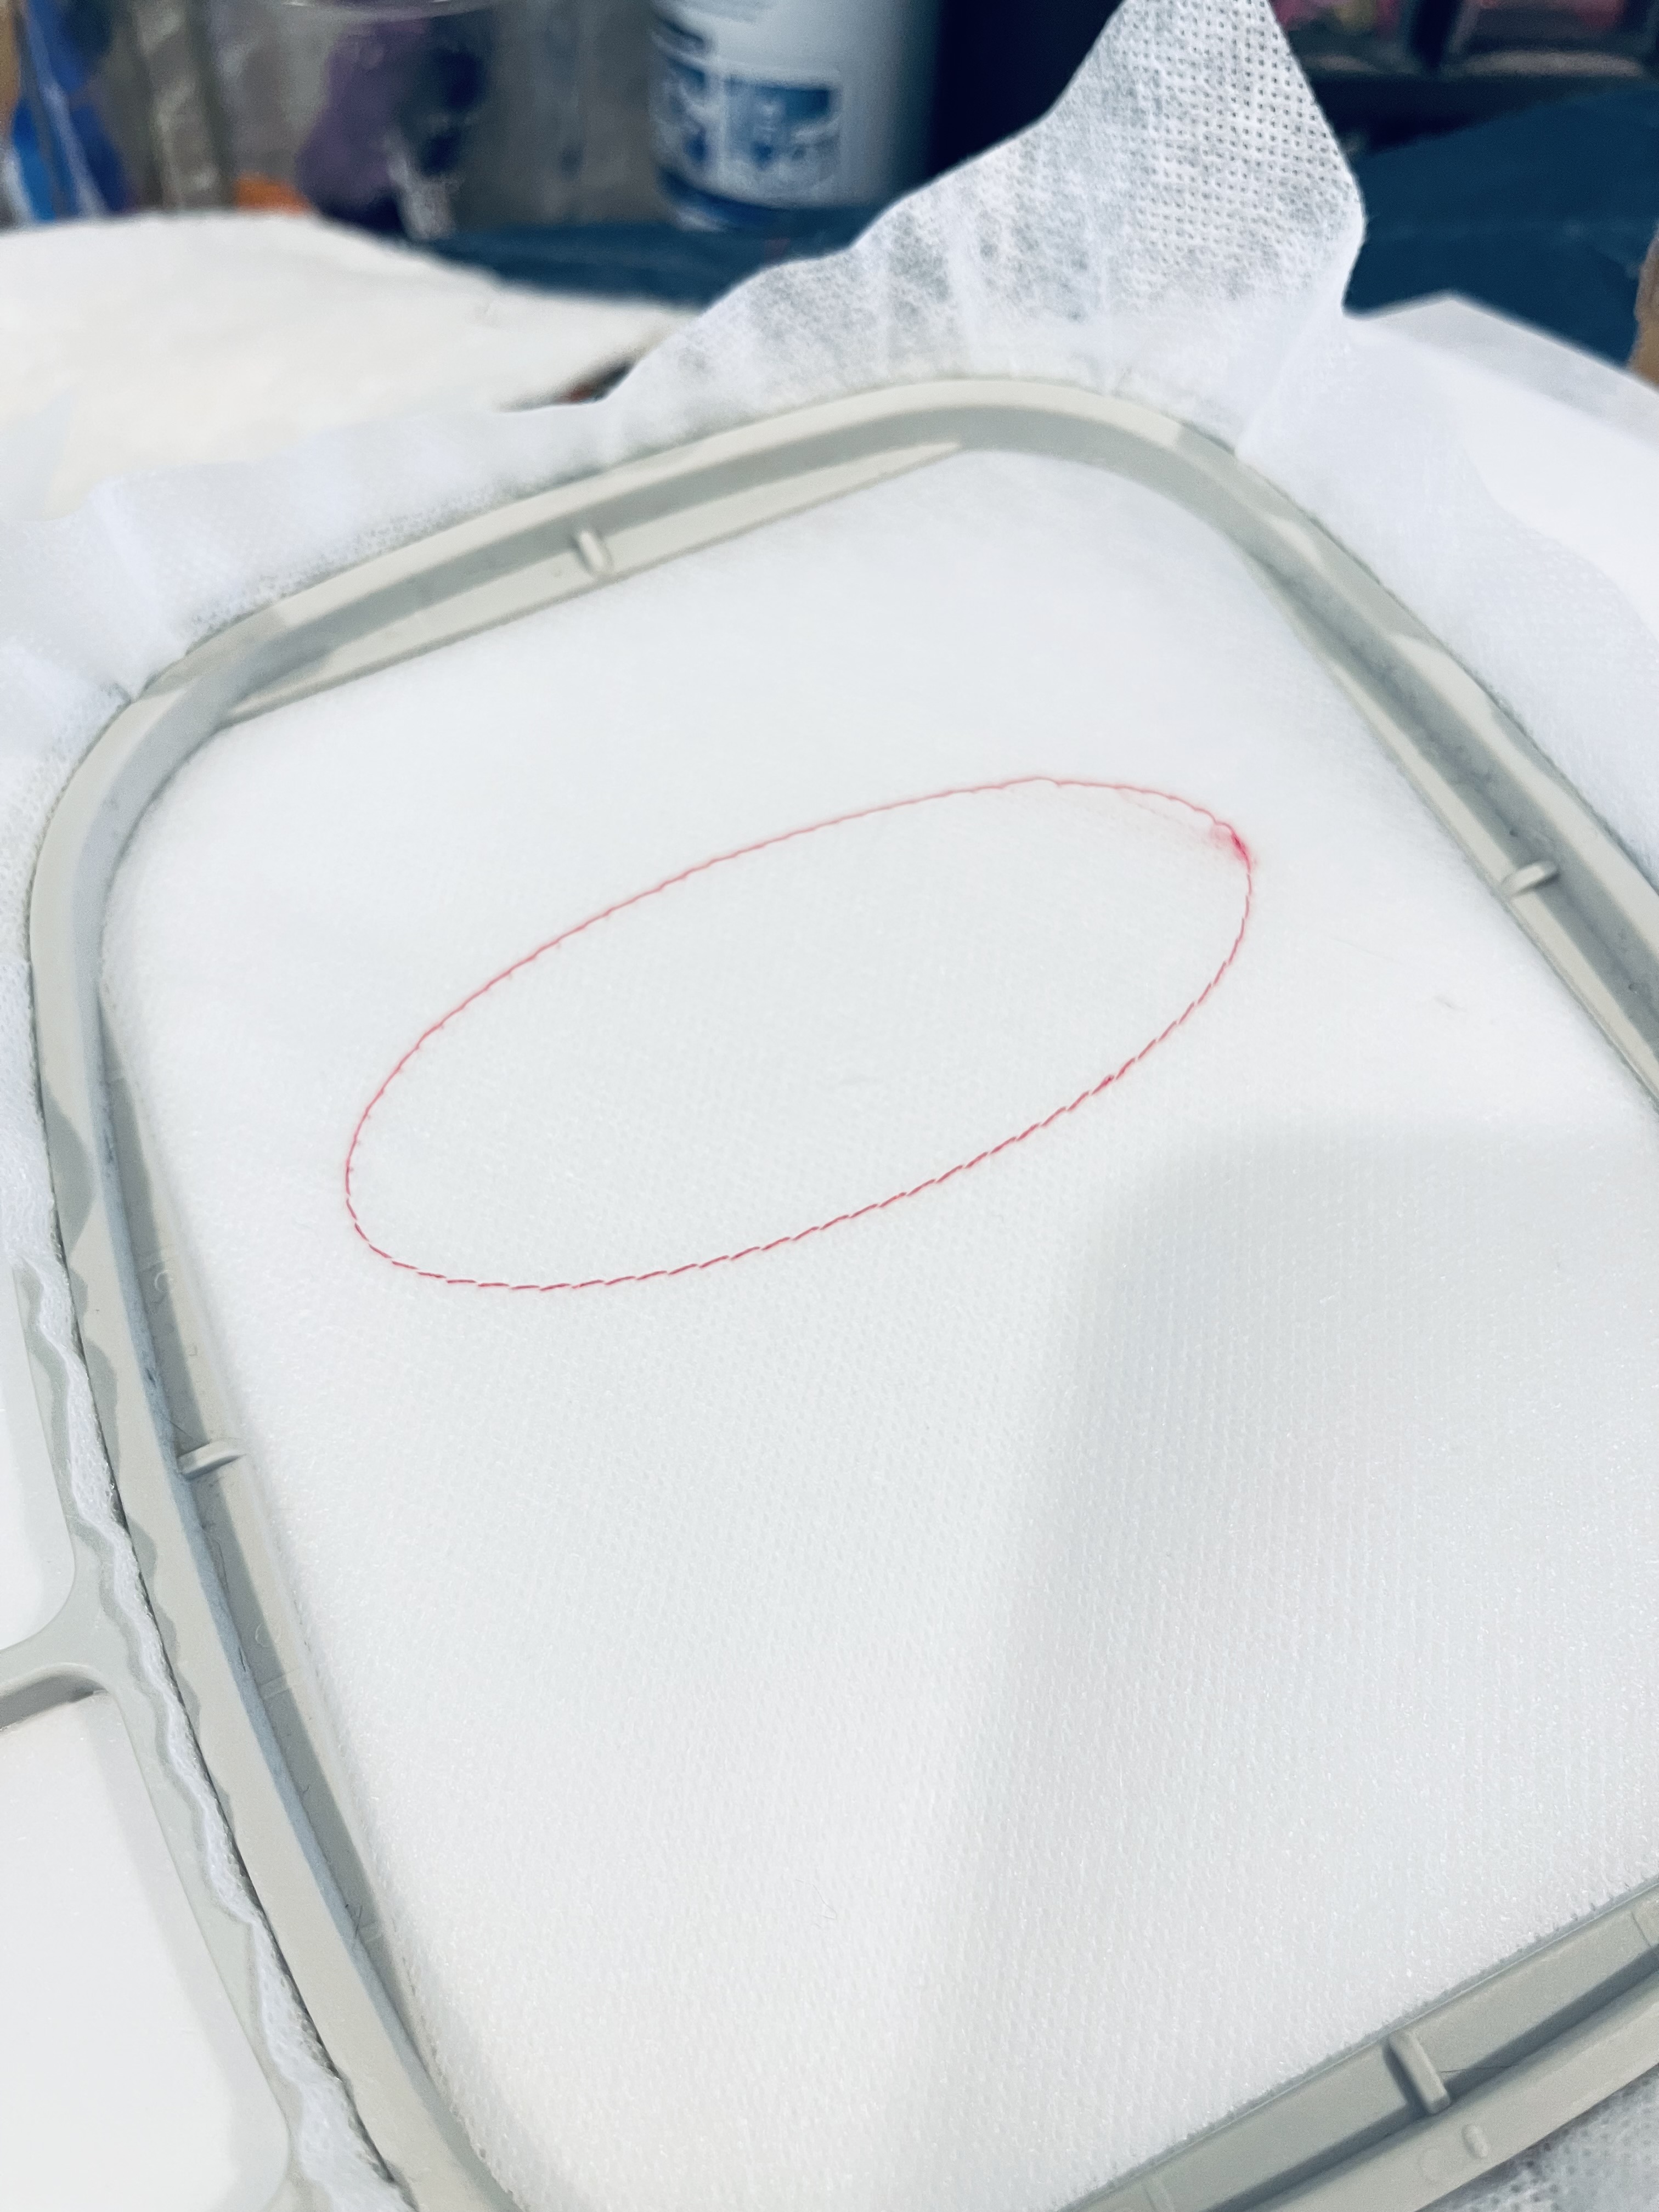
Hoop Washaway Mesh stabilizer (like Inspira’s Aqua Magic or Pellon Wash N Gone 541) tightly in your hoop. You only need one layer of stabilizer when running this design. Run the placement stitch so you know what area of the stabilizer needs to be covered with your material.
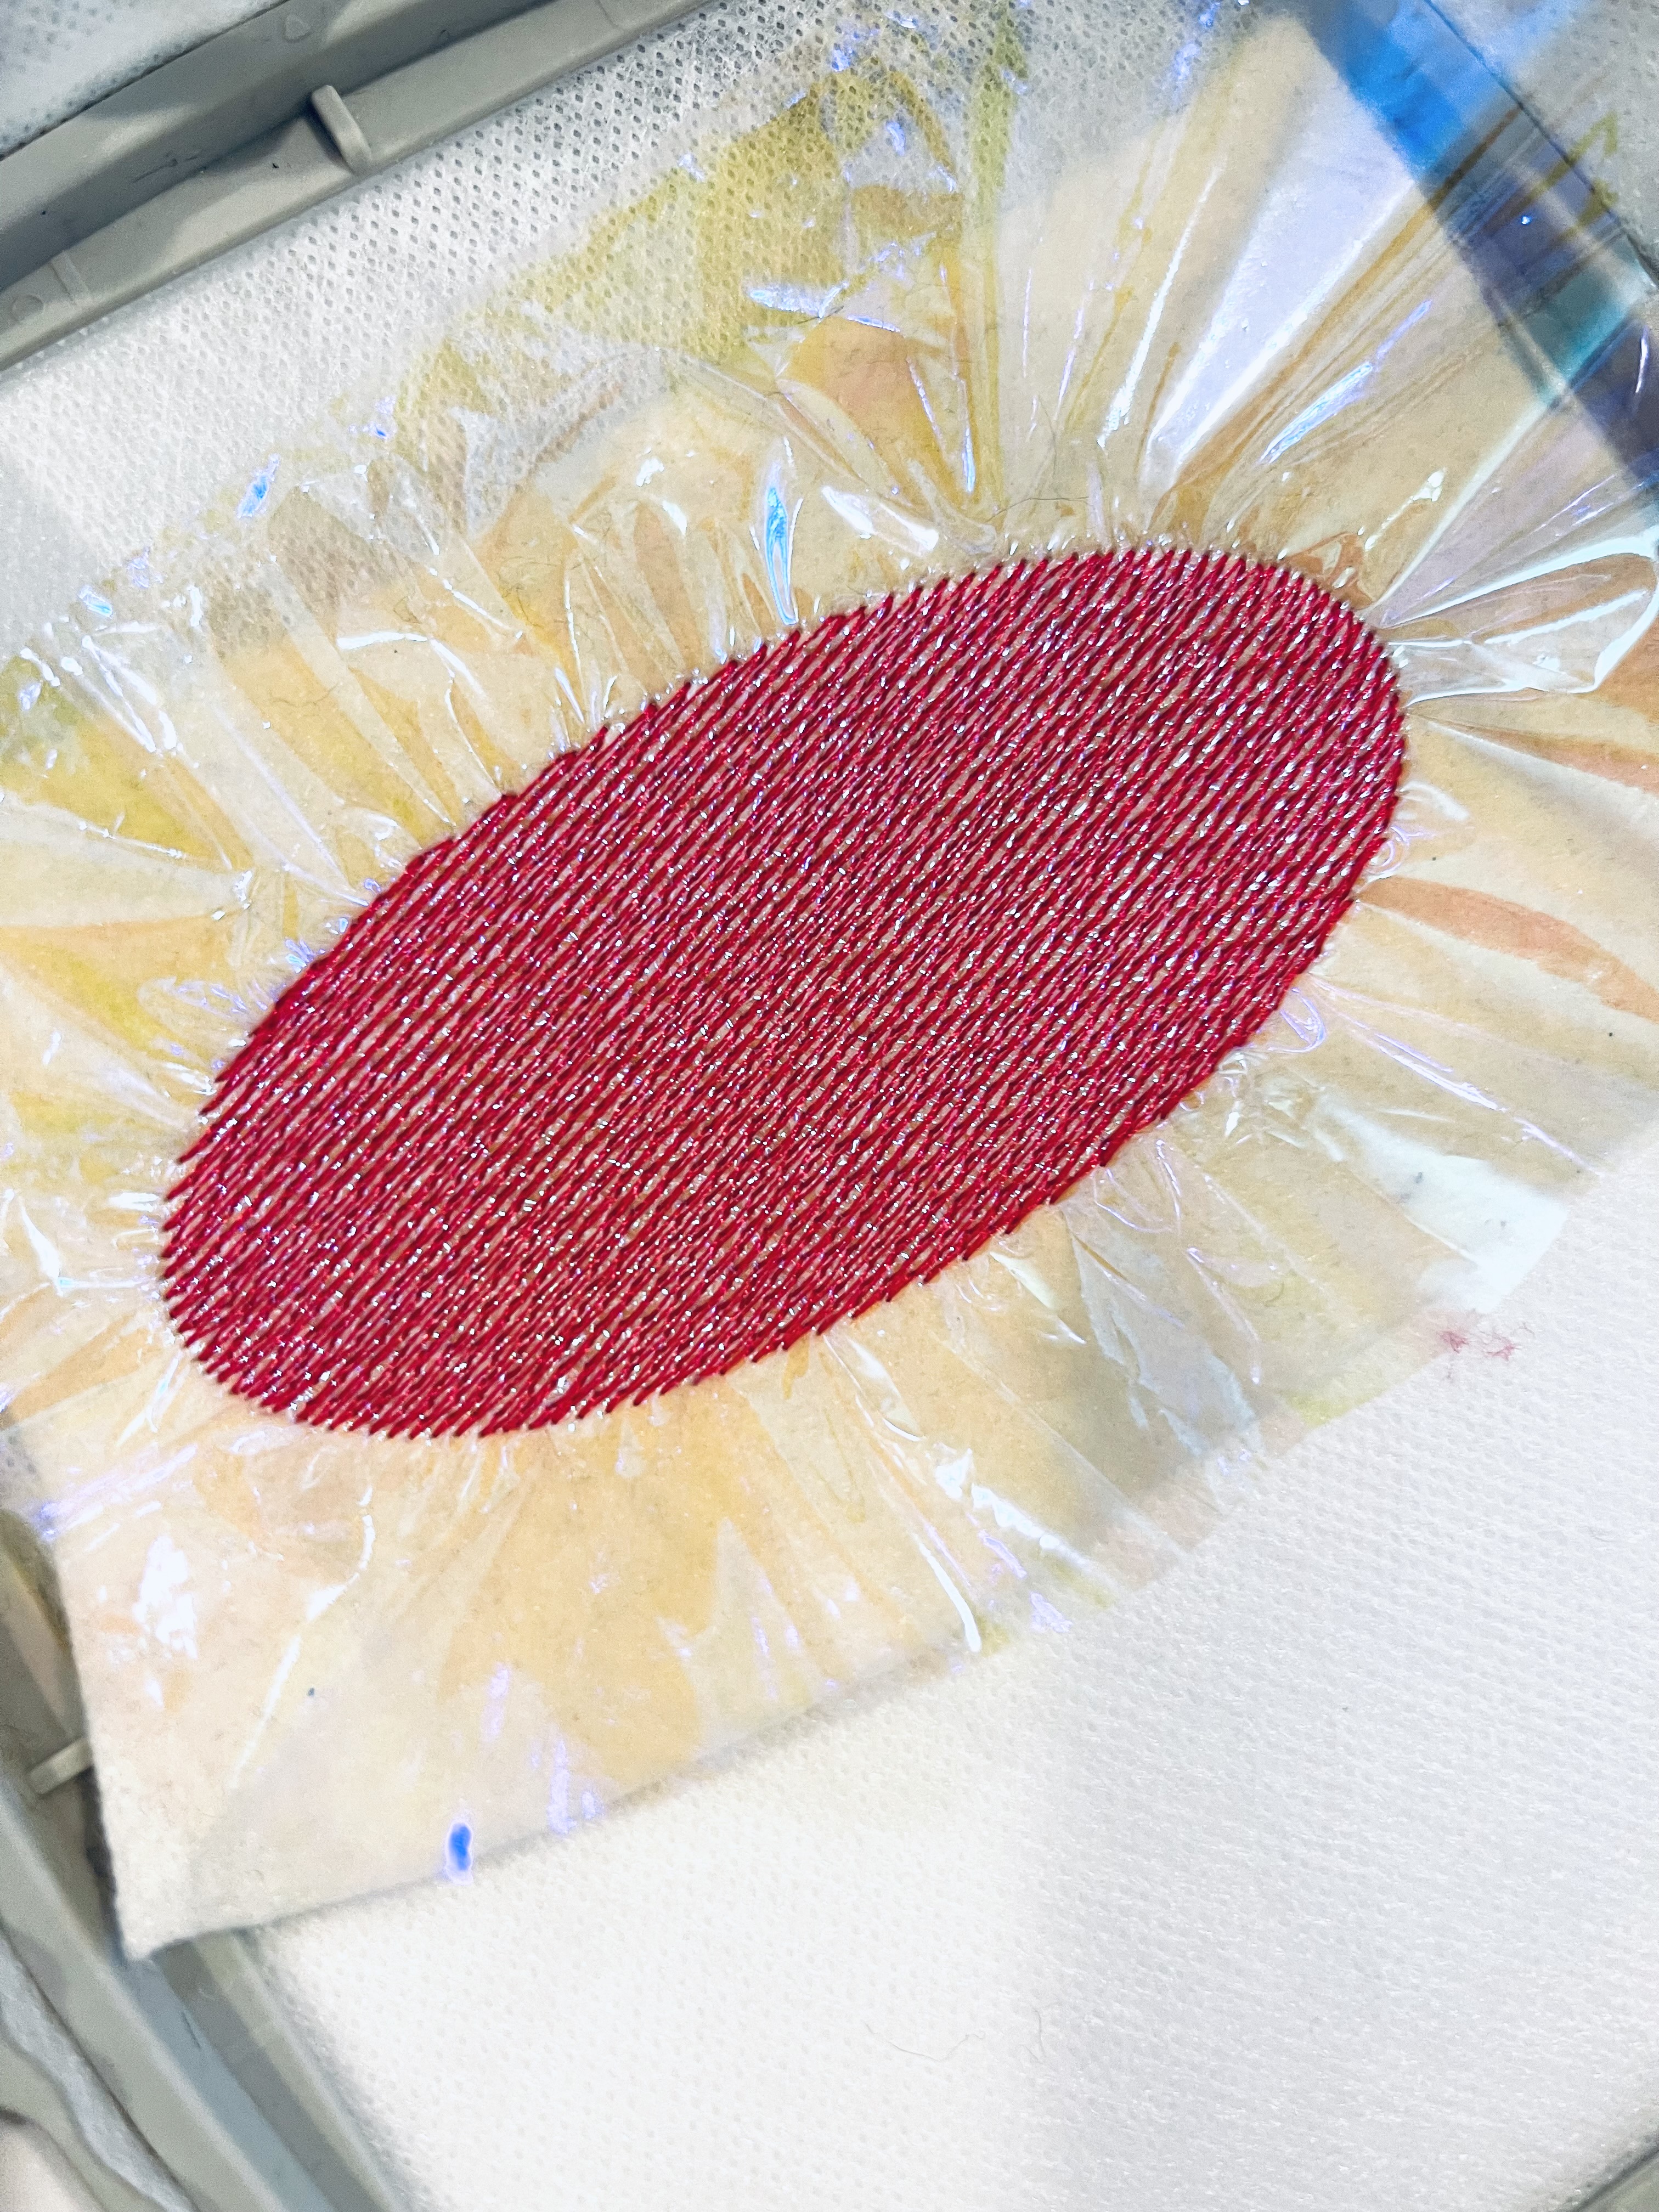
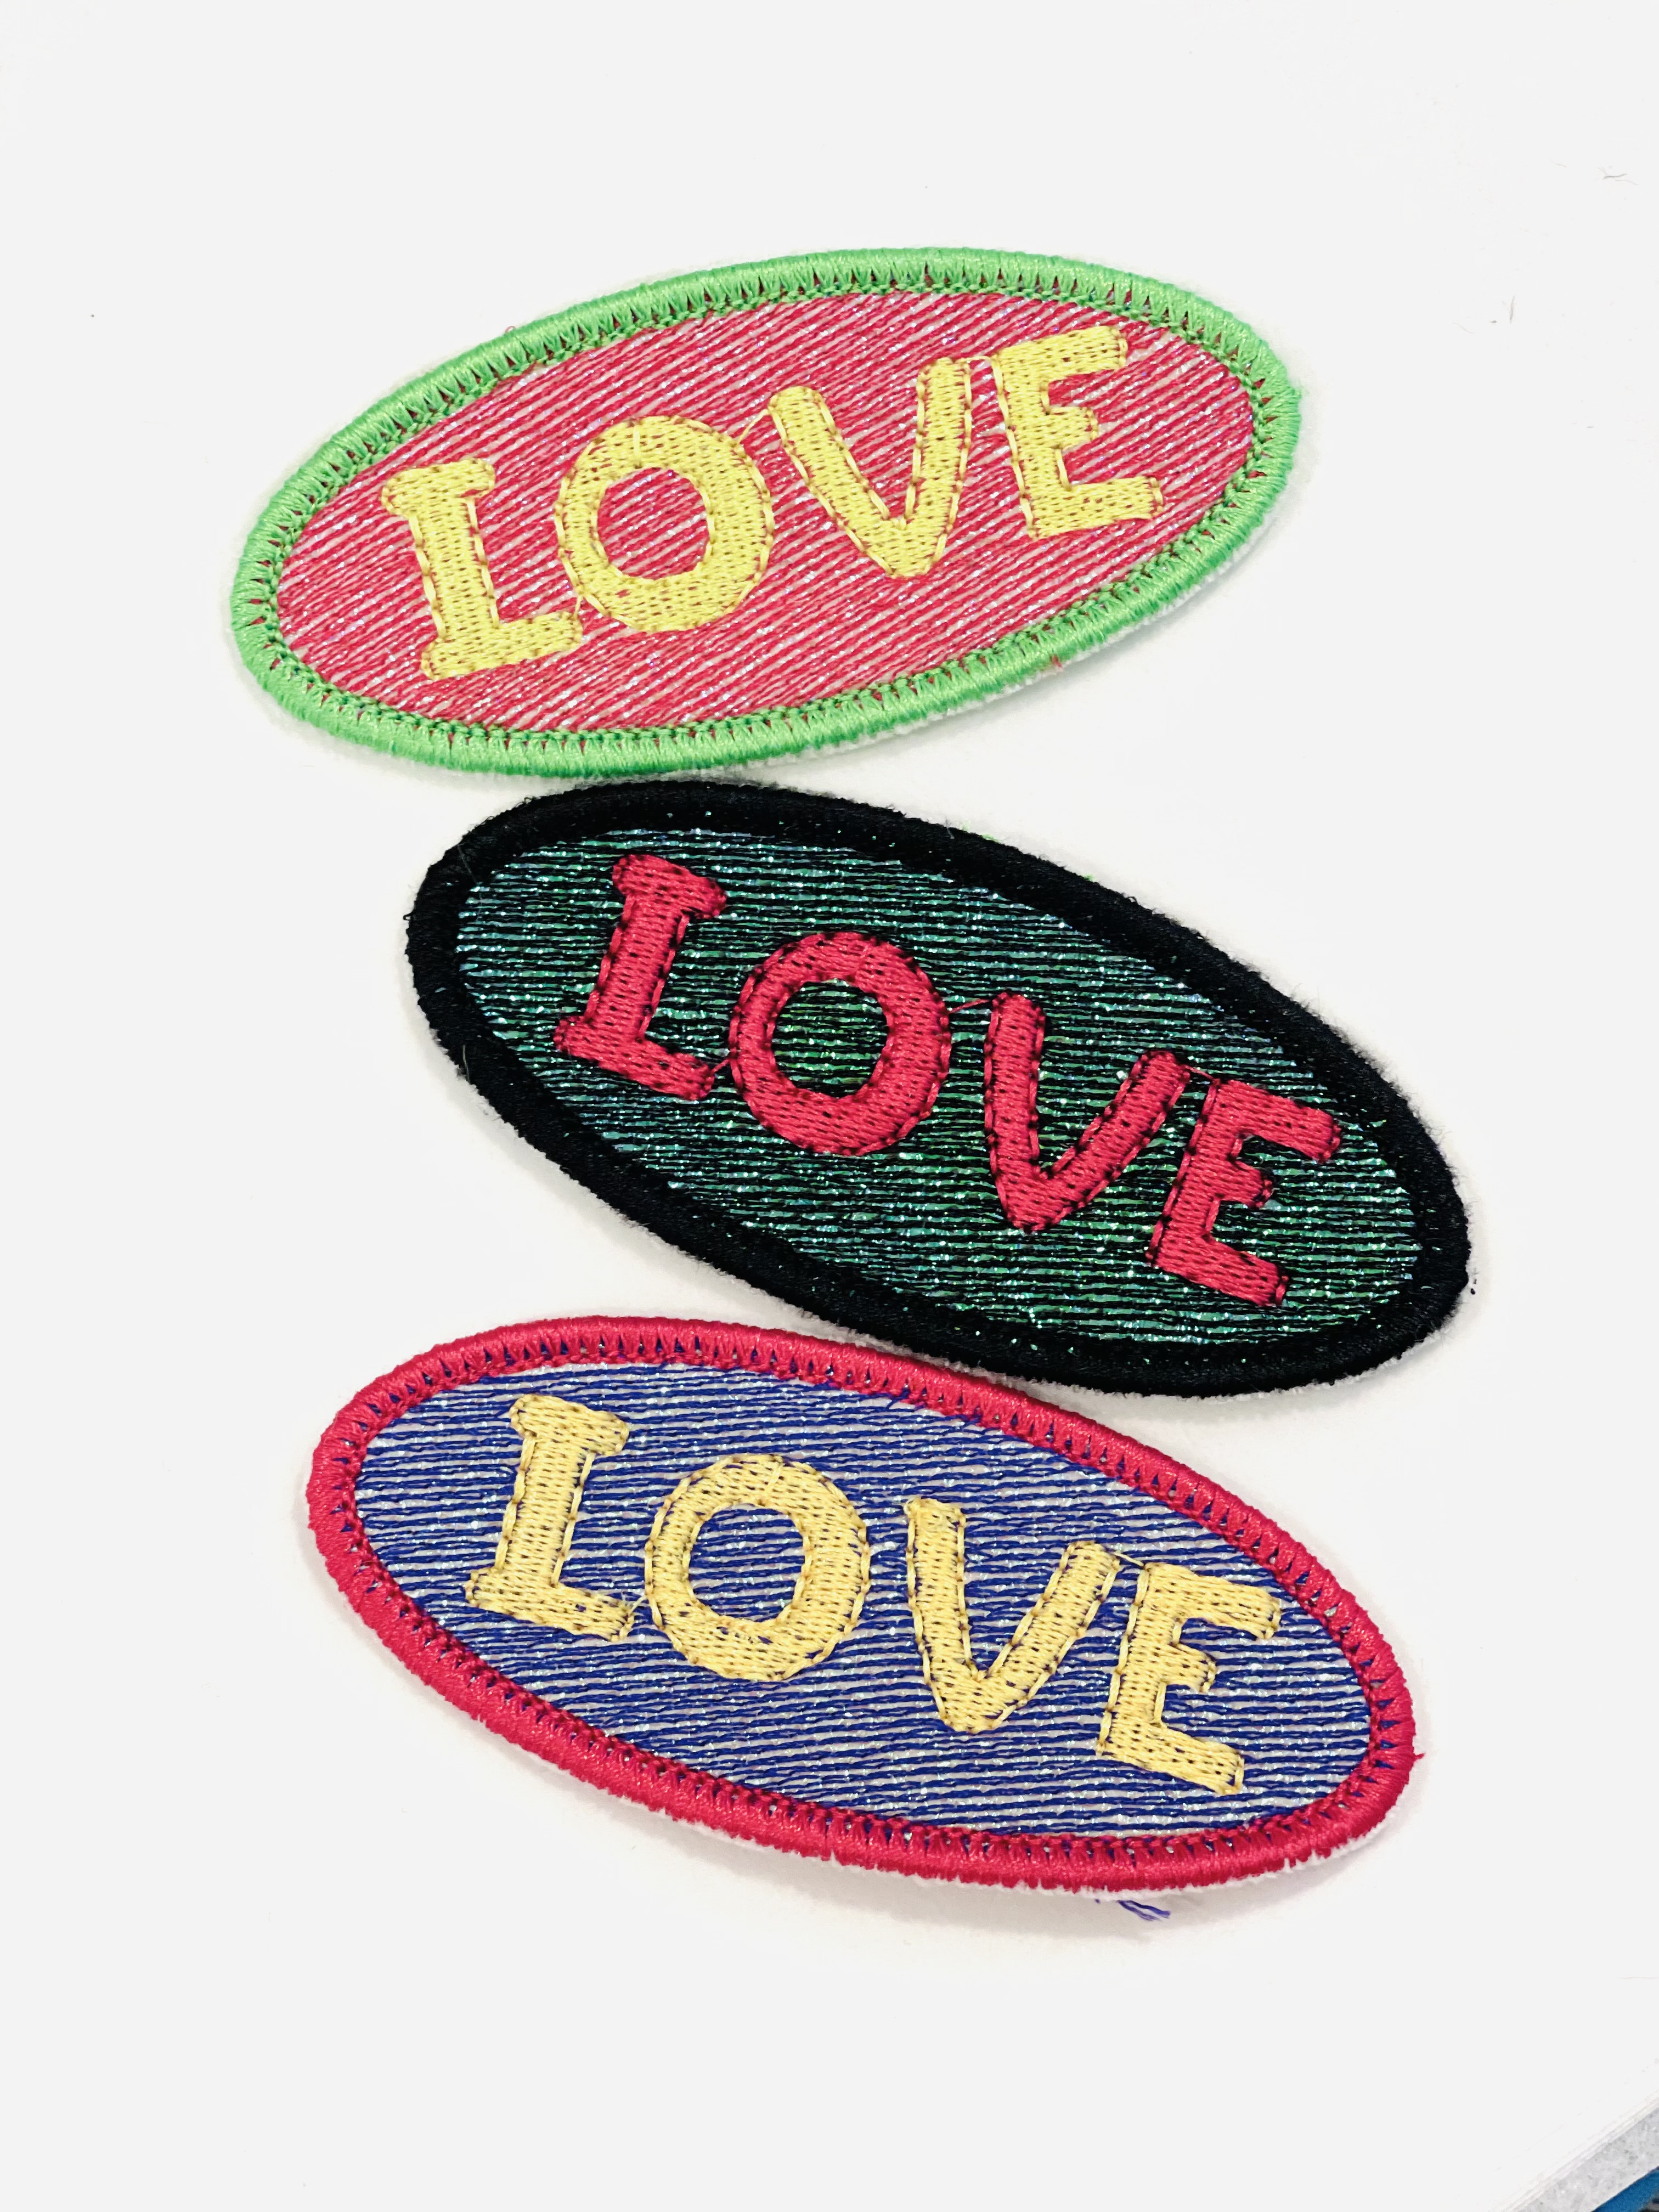
Float a piece of craft felt, then add a layer of iridescent cellophane film over the felt. This film can be found in the gift wrap or basket wrap section of your craft store – choose a neutral clear iridescent color for this effect. I picked up a roll at Michaels that will probably last the rest of my life. For the felt, select a color that is close to the shade you want for the background since the fill stitch is not completely solid. The fun thing about using the iridescent mylar film is that it lends a cool holographic effect to your stitching with your regular embroidery threads.
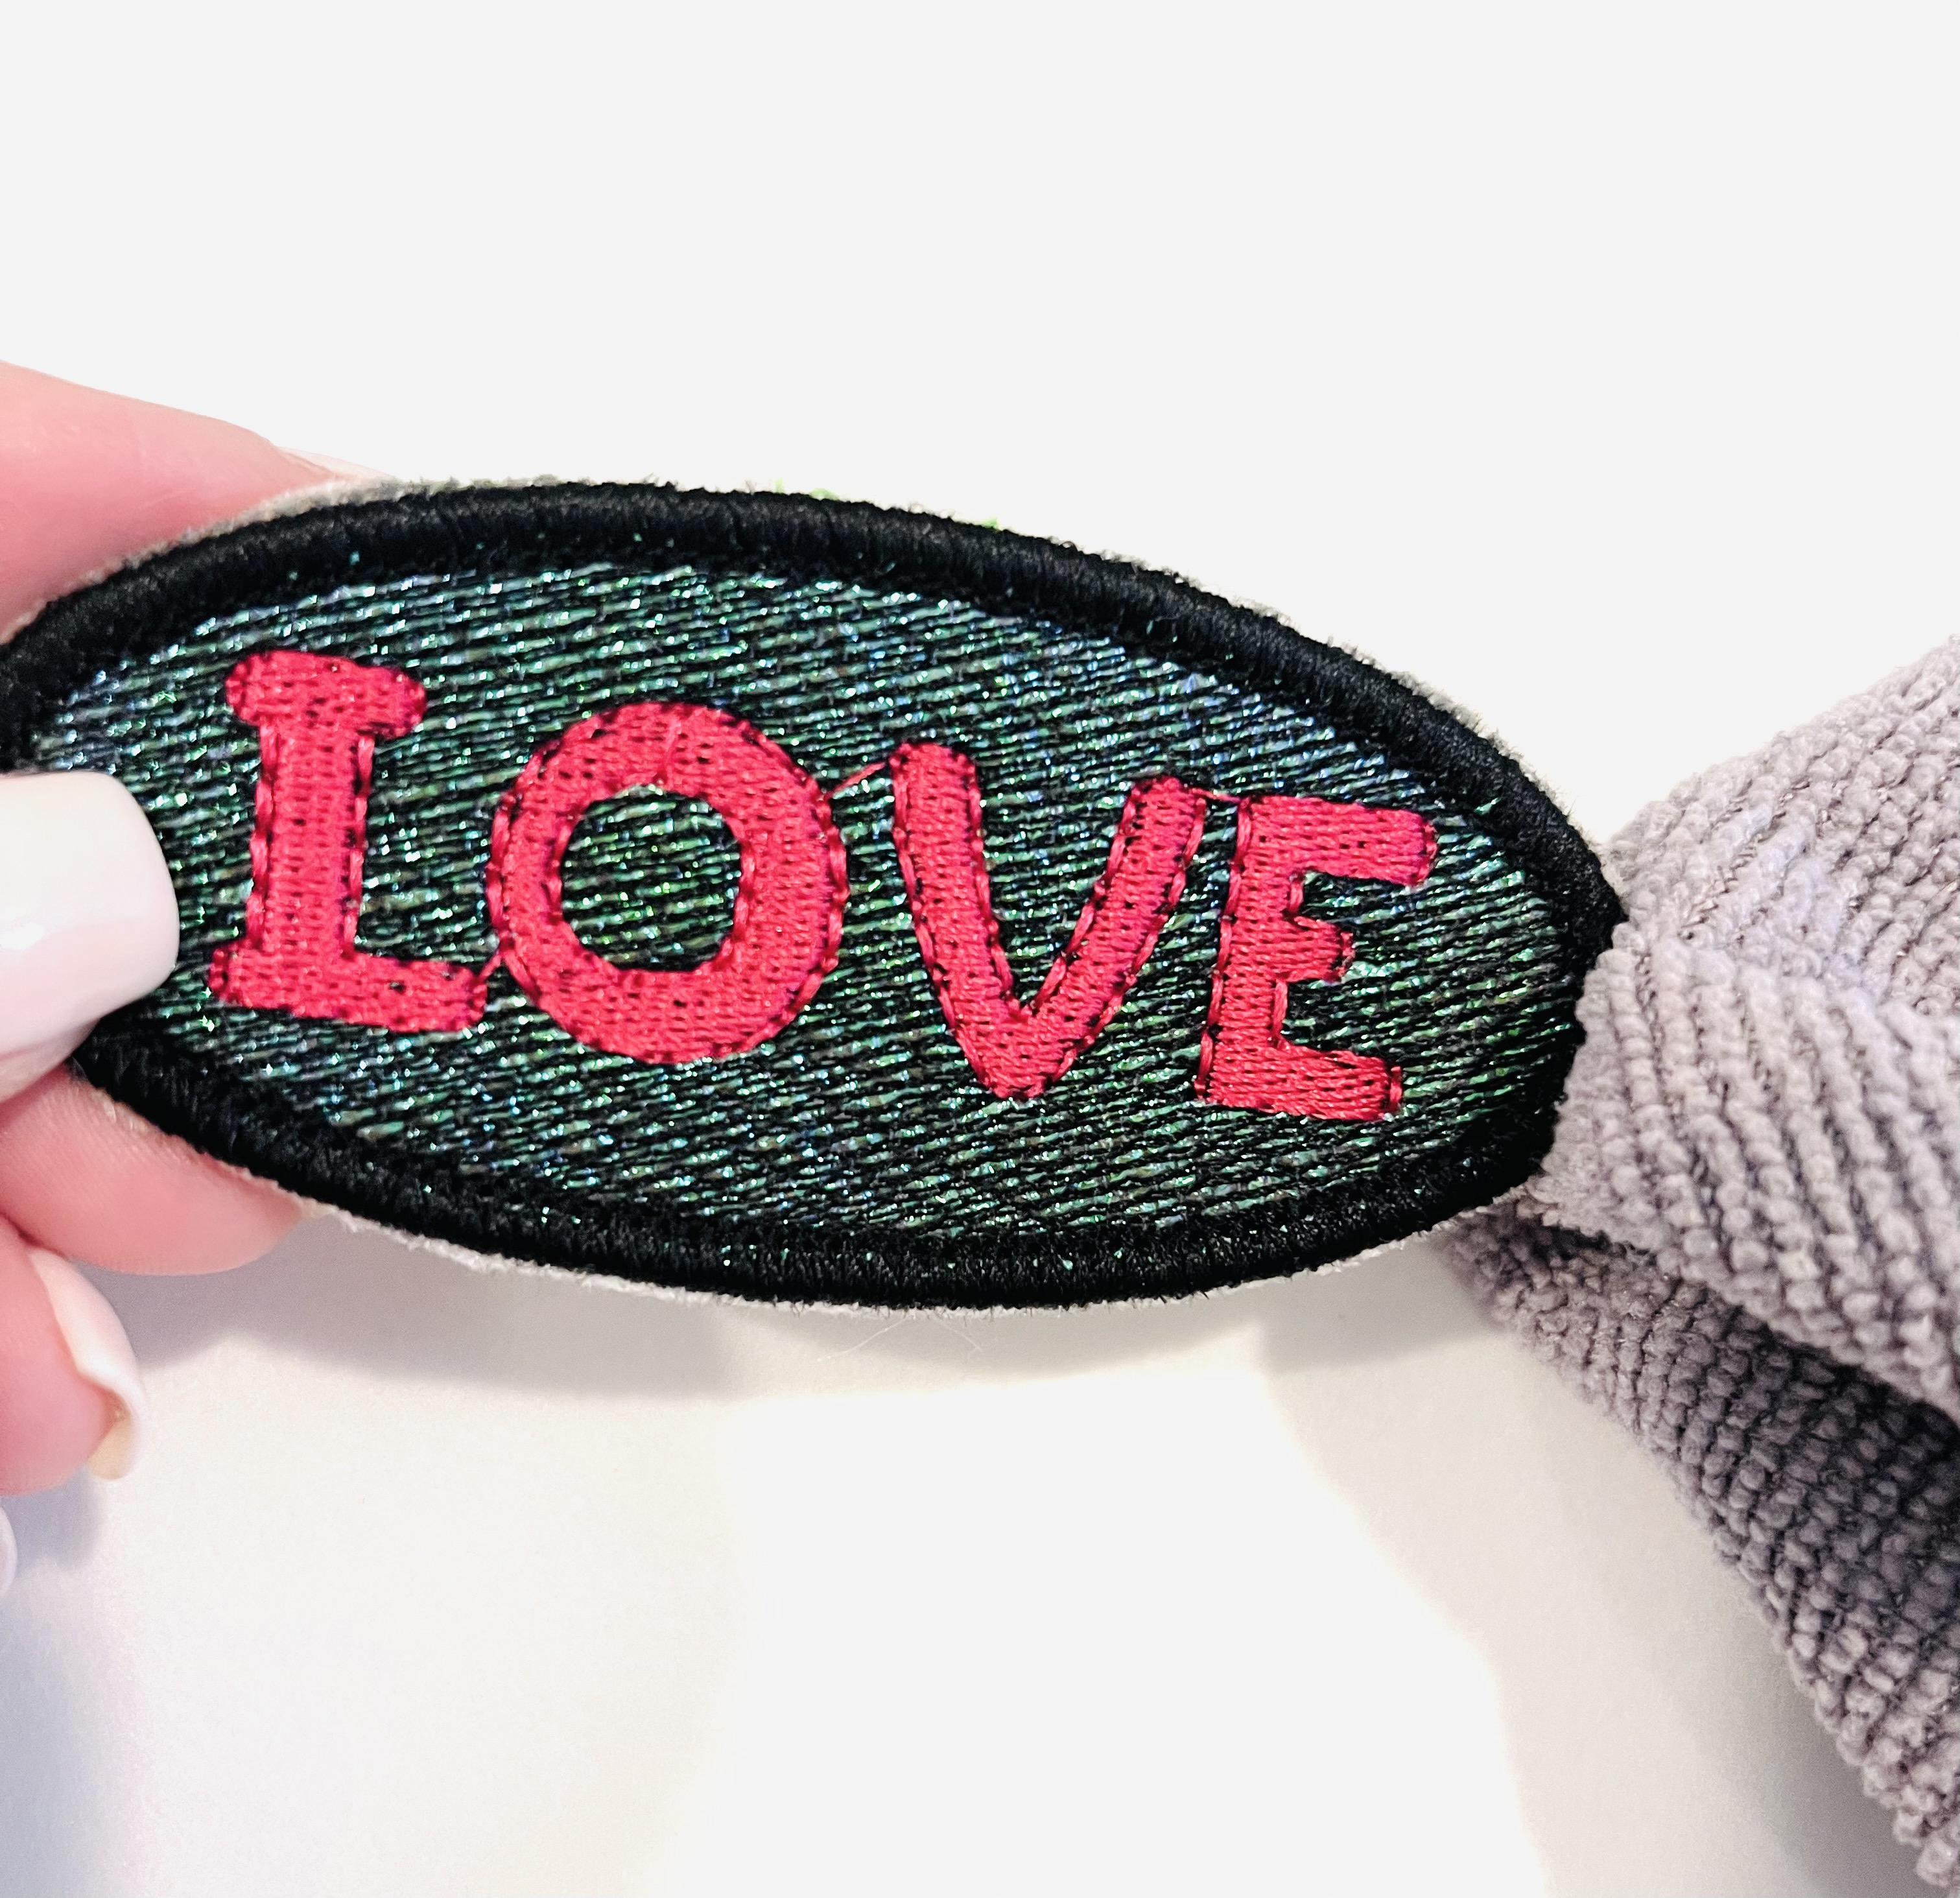
Run the fill stitching for the background. You can see that if you use different colors you could achieve really creative effects by using contrasting or variegated thread stitching for the fill. For the black patch (see the main photo) I used a dark grey felt (because it was on top of my felt pile and black felt would have been fiddly to get to right then) but used black thread to stitch the background over the mylar. You can’t even tell that the felt was grey or black, because you get the effect of the mylar through the stitching, so it really is a fun effect to play with.
Run the patch details in your chosen colors. For this patch, I chose colors that contrasted dramatically with each other – opposite each other on the color wheel, so they would be fun and groovy and kind of play off the iridescent mylar that shimmers through.
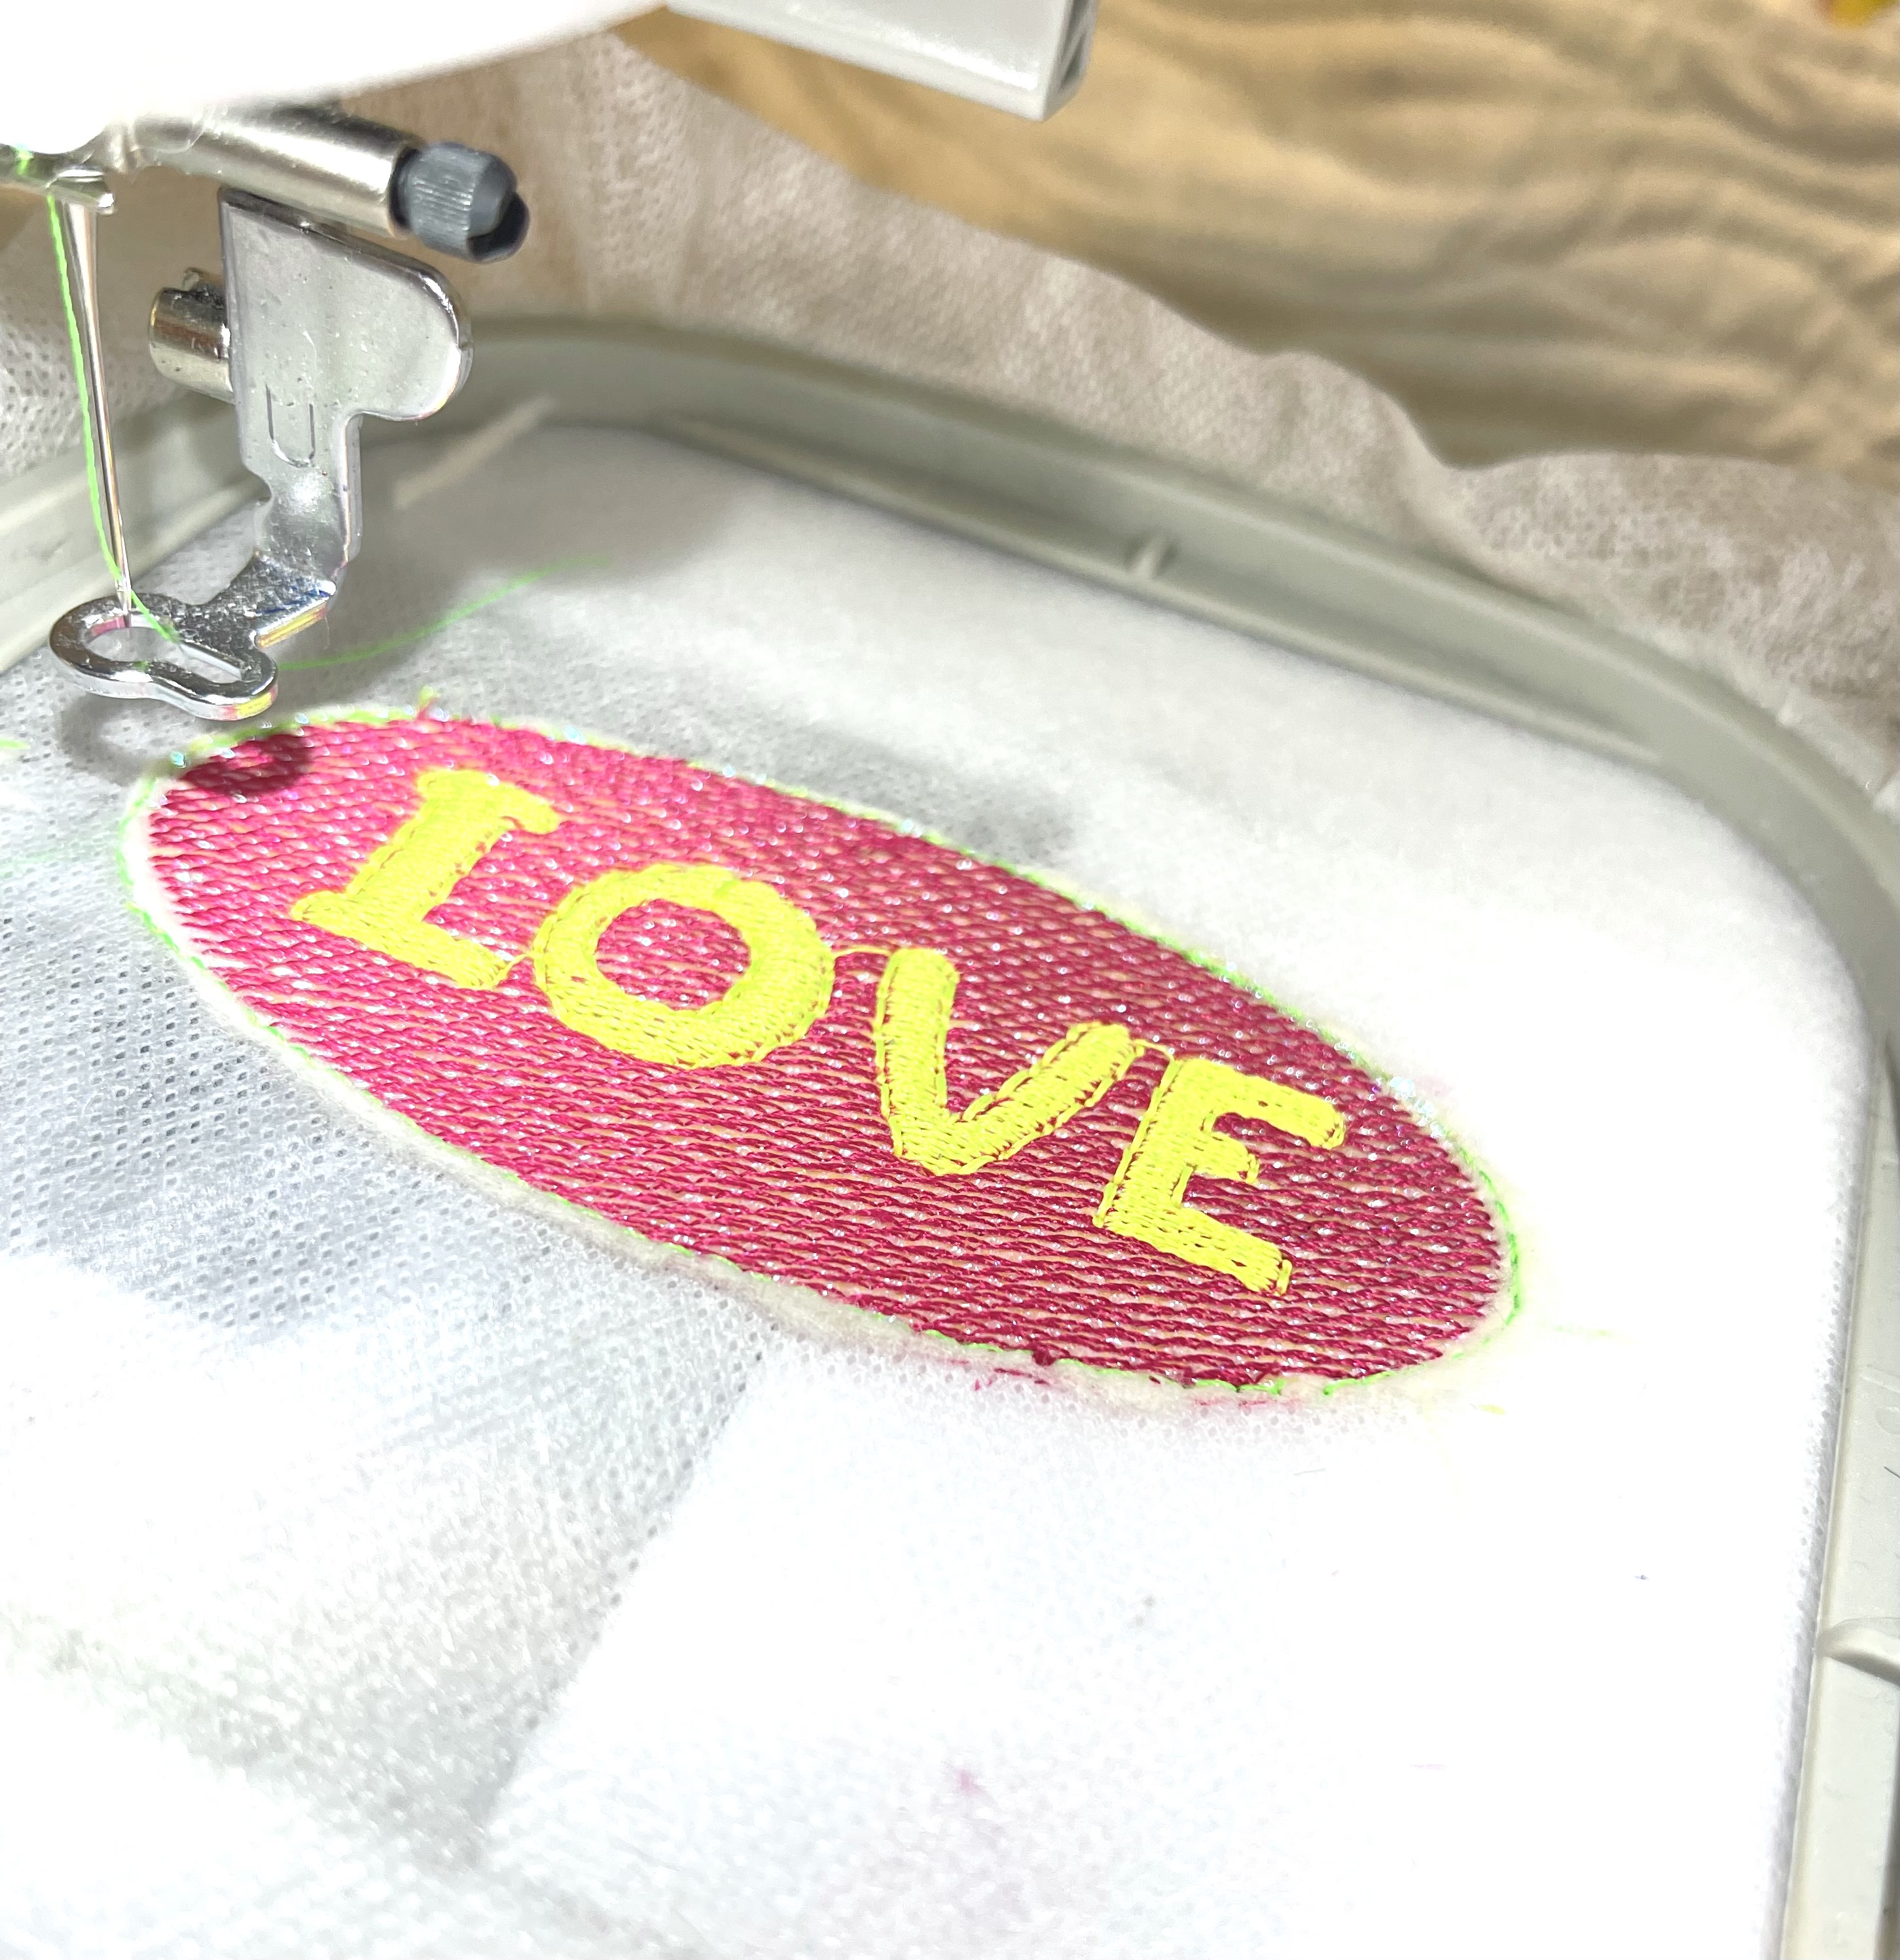
After your details are stitched out, the Merrowed Edge Patch Border will run a single line of stitching. Use this to help you pull the excess Mylar away. Of course, if the edges of your Mylar piece try to get in the way of your detail stitching, pull it away before you run the details. I get impatient so I pulled mine off right away after the fill stitching. You can run this line of stitching in the same color you will use for your Merrowed Edge. Be sure that you change your bobbin thread to match your top thread for the Merrowed Edge.
Trim around the felt very close to the stitching line without going into the stitching. Get as close as you can so that you get a really clean edge and don’t have to do a lot of fiddling around afterwards.
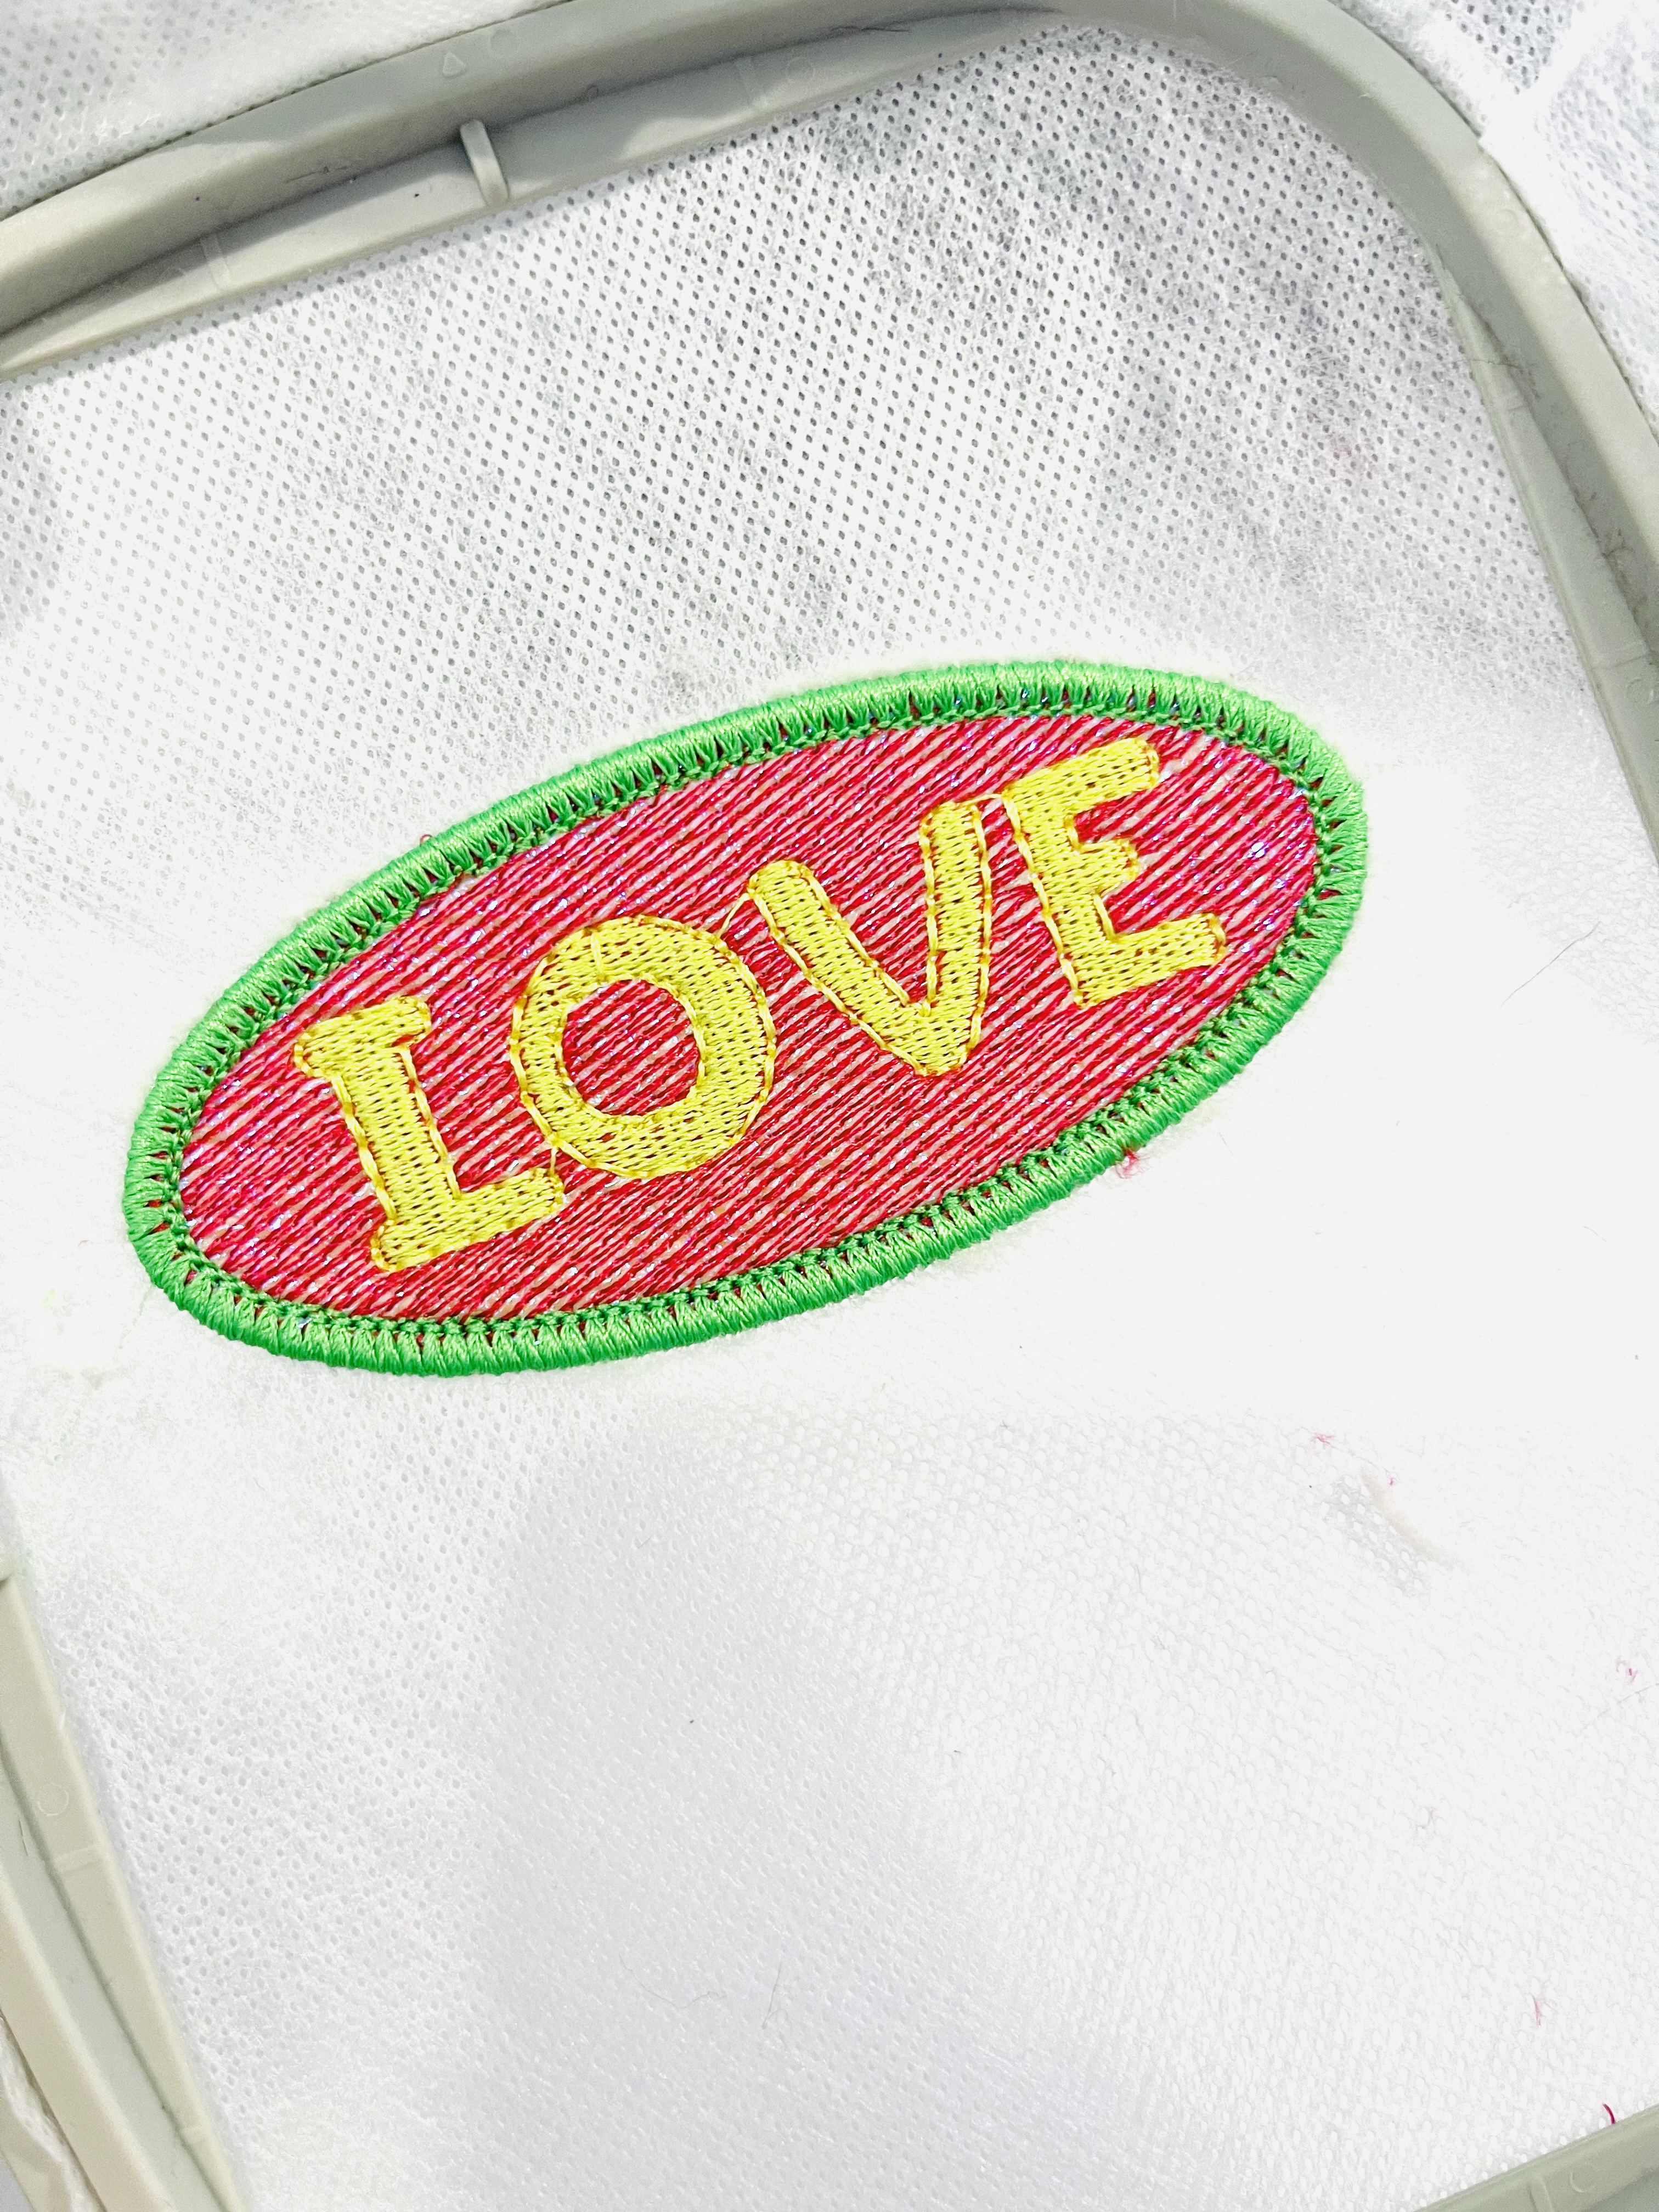
Run the merrowed edge stitching for your patch and admire that beautiful edge!
Remove your project from the hoop and very carefully trim around the patch edge without cutting into the Merrowed Edge stitches. If you have excess stabilizer, you can run a damp sponge or washcloth around the edge to further clean up the edge.
After your patch is dry, your patch is ready to apply wherever you want it! You can use a thermal adhesive cut to fit your patch, or apply it with an adhesive like Beacon Fabri-Tac or Aleene’s Fabric Fusion. Of course, you can sew it on anything you’d like as well! Sew it on your jacket, cap, or backpack for extra fun (and sparkle!)

I seriously think this iridescent effect is better than glitter (I can’t believe I said that because I LOVE GLITTER!)
Do you want to try playing with iridescent cellophane? Or with patches like this? Head over to my digital embroidery designs website and get this patch design for FREE with code PATCHLOVE! While you are there, check the green banner at the top of the page to see what other specials are going on right now, too! If you make these, please tag me over on Facebook or Instagram #designsbybabymoon because I want to see what cool color combos you come up with and where you are using your patches! Let’s make ALL the LOVE patches!

